Write a guide for your clients
For verified coaches and therapists. Turn what you already give clients into a guide, share it with the clients you choose, see it the way they will, and publish it.
A guide is a plan you write once and share: goals, the steps under them, and any files that go with them. A client who starts it gets their own copy on their plans, to work through at their own pace. Writing a guide is how a handout, a checklist or a first-month plan you already give people becomes something they can follow in Specthrive.
Only you can see a guide until you share it. Nothing reaches anyone until you publish it, and then only the clients you've added, or anyone on the Guides page once Specthrive lists it.
1. Find My guides
My guides is for verified professionals. Once your professional account is verified, My guides sits in the sidebar next to Clients. Anyone else who opens it sees "Guide authoring requires a verified professional account." Guides you've added from the Guides page stay where they are, under Guides.
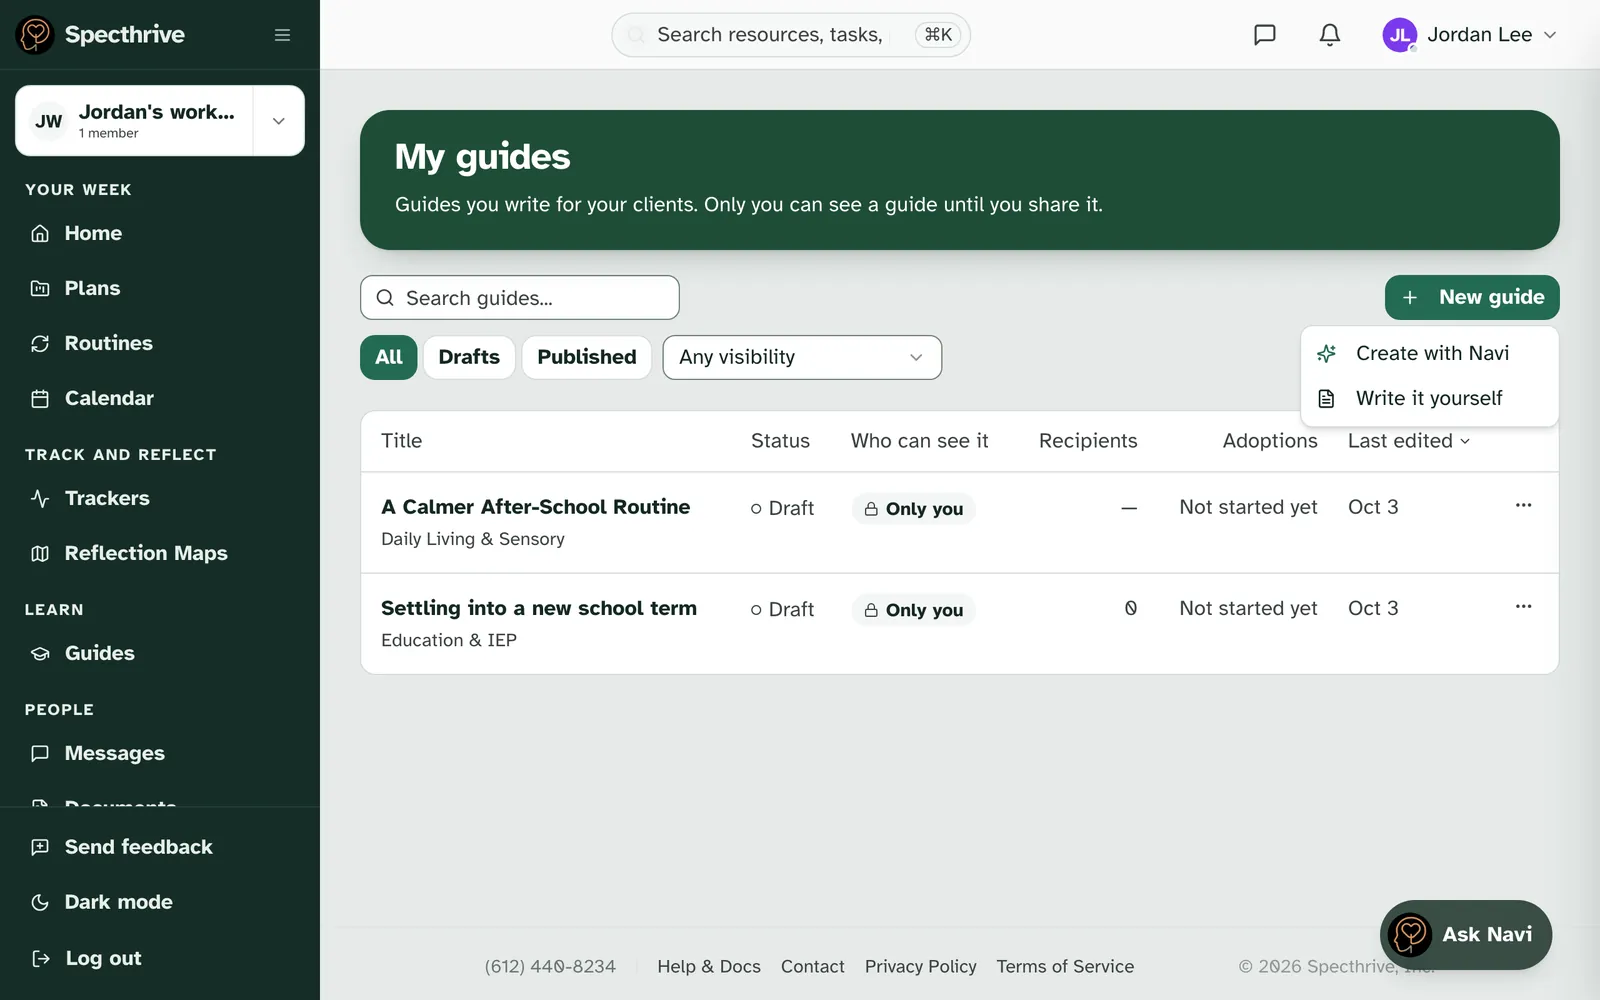
Your first visit starts with what you already give clients. Until you've written one, the page says "Your first guide starts with what you already give clients." It offers Create with Navi or Write it yourself. Under "Or start from an idea:" are a few ideas to start from, such as "A calmer after-school routine".
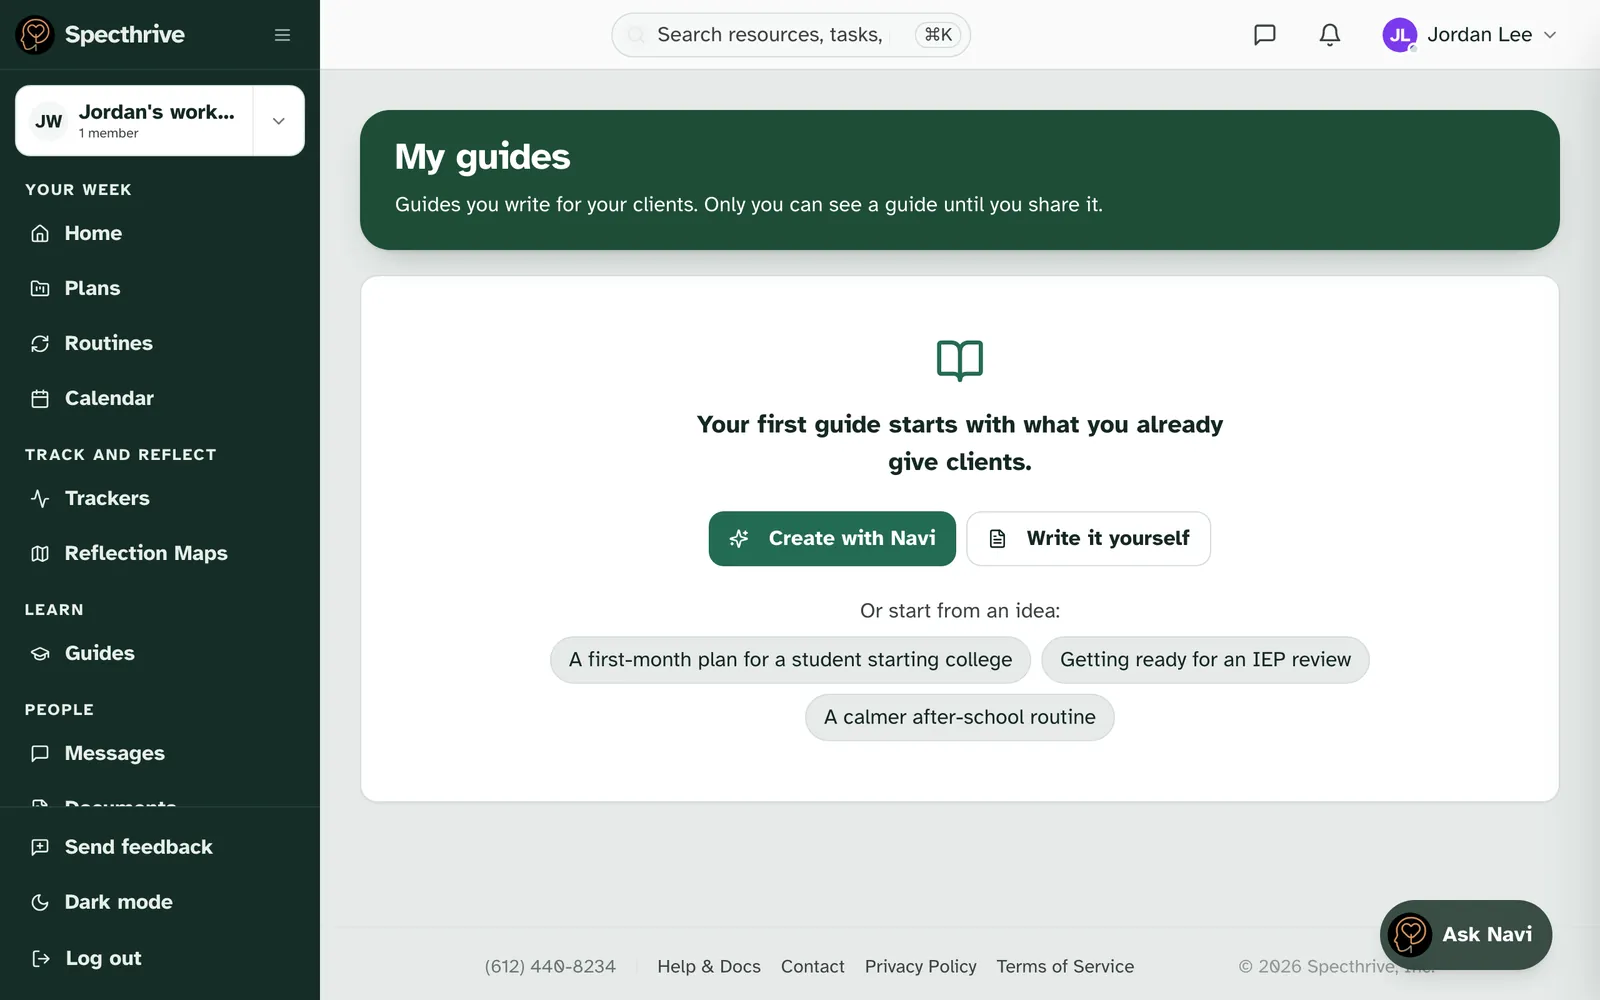
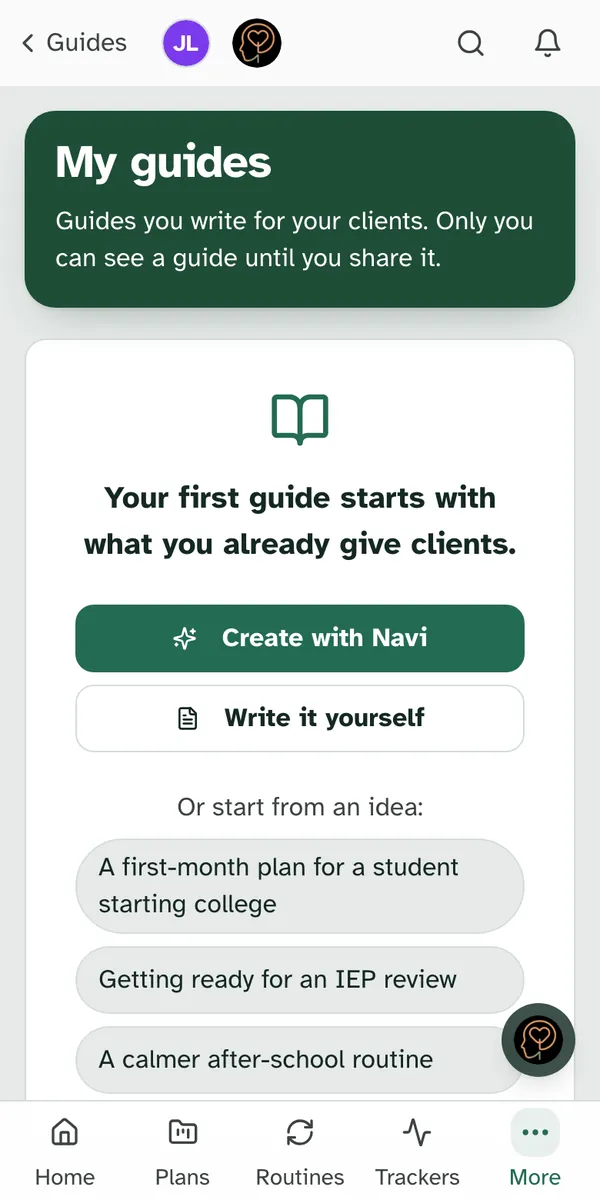
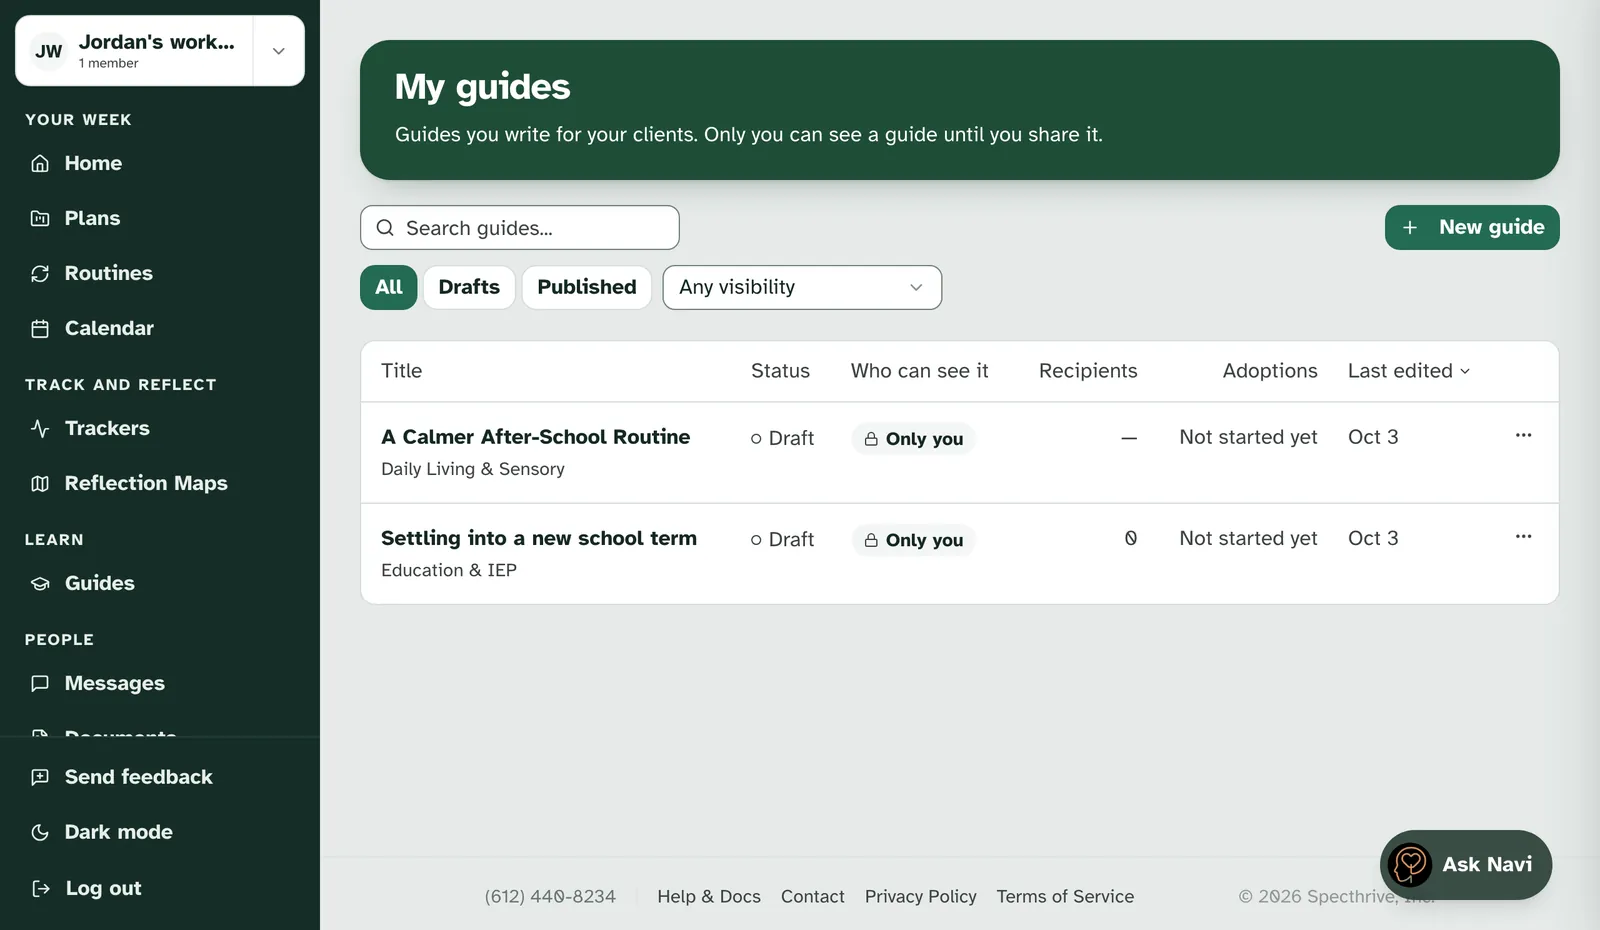
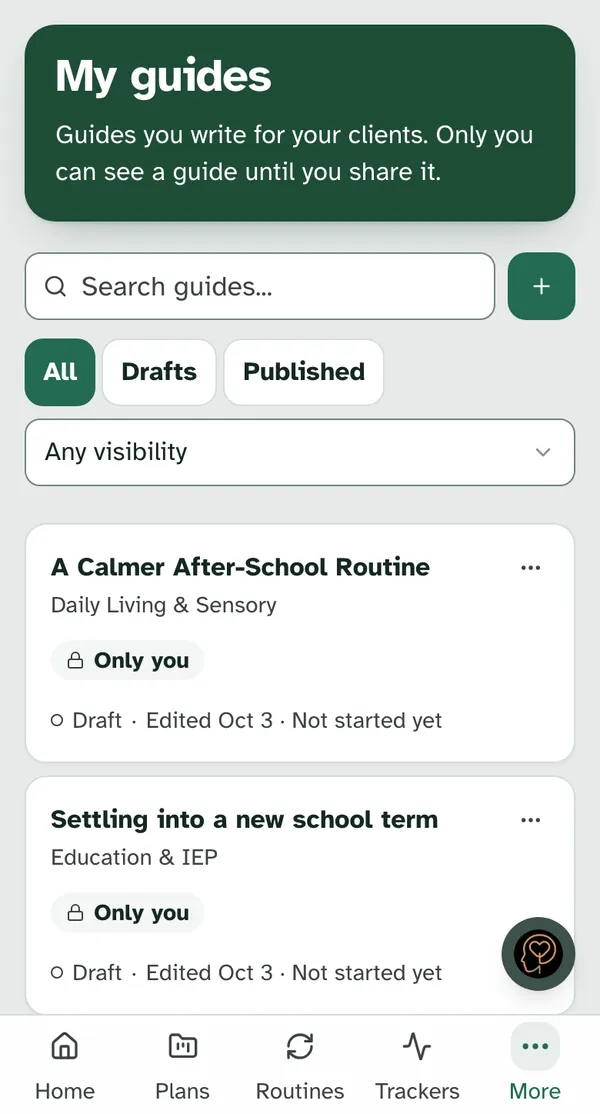
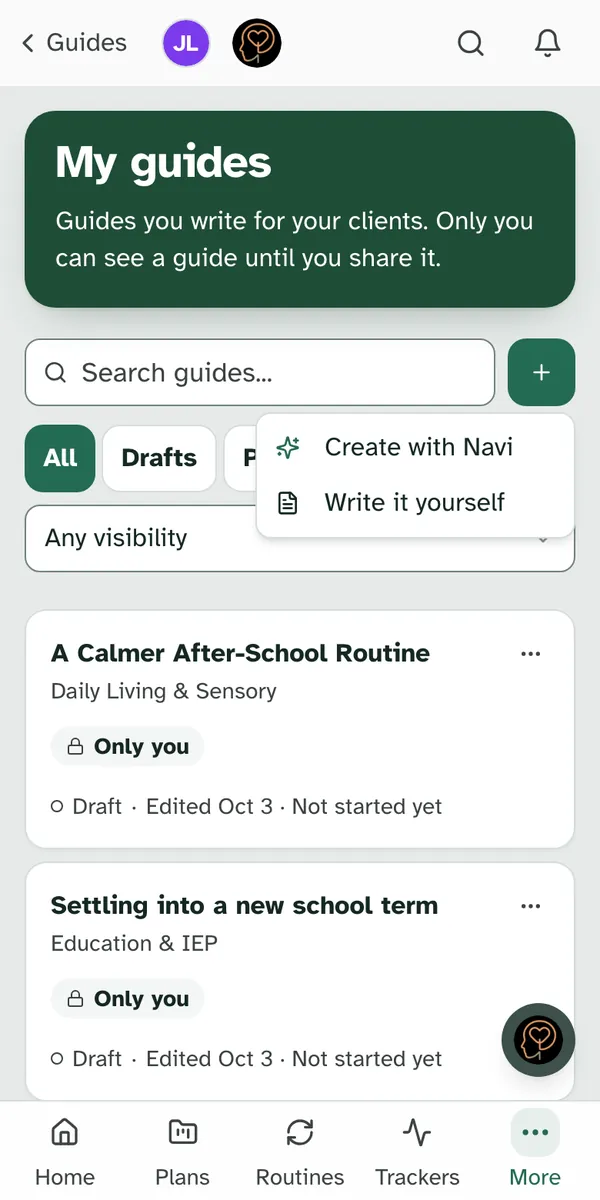
After that, the page lists every guide you've written. It's headed My guides: "Guides you write for your clients. Only you can see a guide until you share it." Each row shows its Status, Who can see it, how many Recipients and Adoptions it has, and when you last edited it. Search with Search guides..., or narrow the list to Drafts or Published. The ... menu on a row has Preview as a client, Publish or Unpublish, and Delete for a draft nobody has added yet.
2. Start a guide
Choose New guide. On a phone it's the + button next to the search. It offers the same two ways in:
- Create with Navi opens a conversation with Navi. Describe who the guide is for and what it should help with, and Navi drafts goals and steps for you to edit.
- Write it yourself asks you to Name your guide. Everyone you share it with sees the title, so keep clients' names out of it. Choose Create and the guide opens in the editor, ready for goals.
3. Build it in the editor
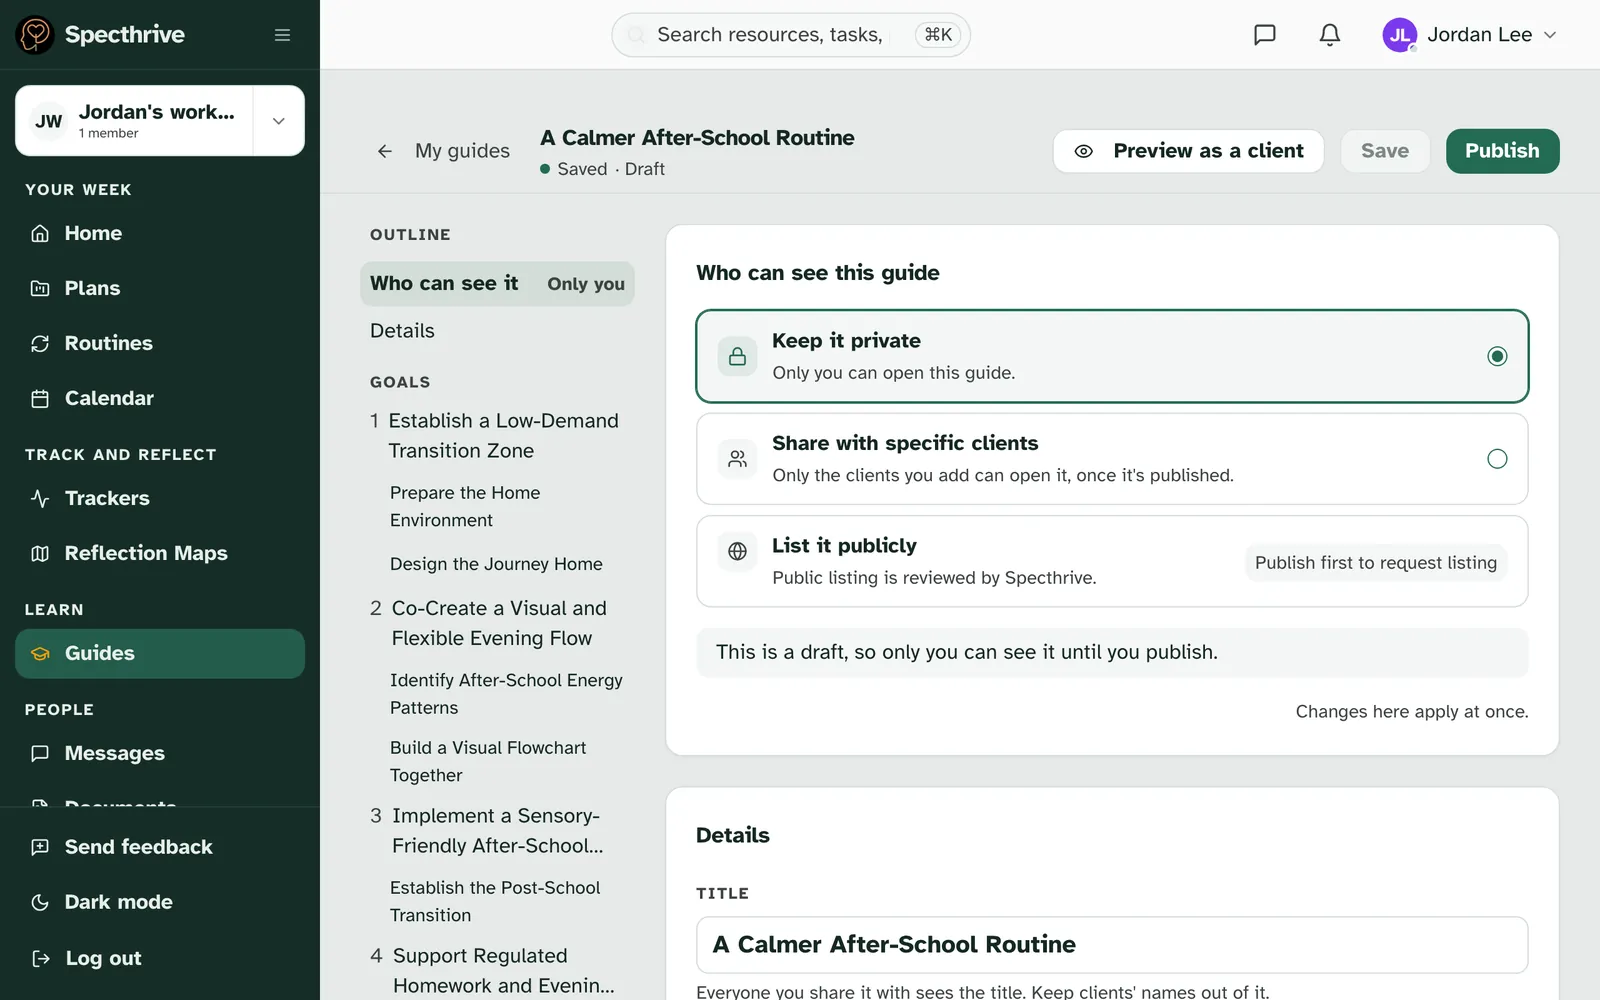
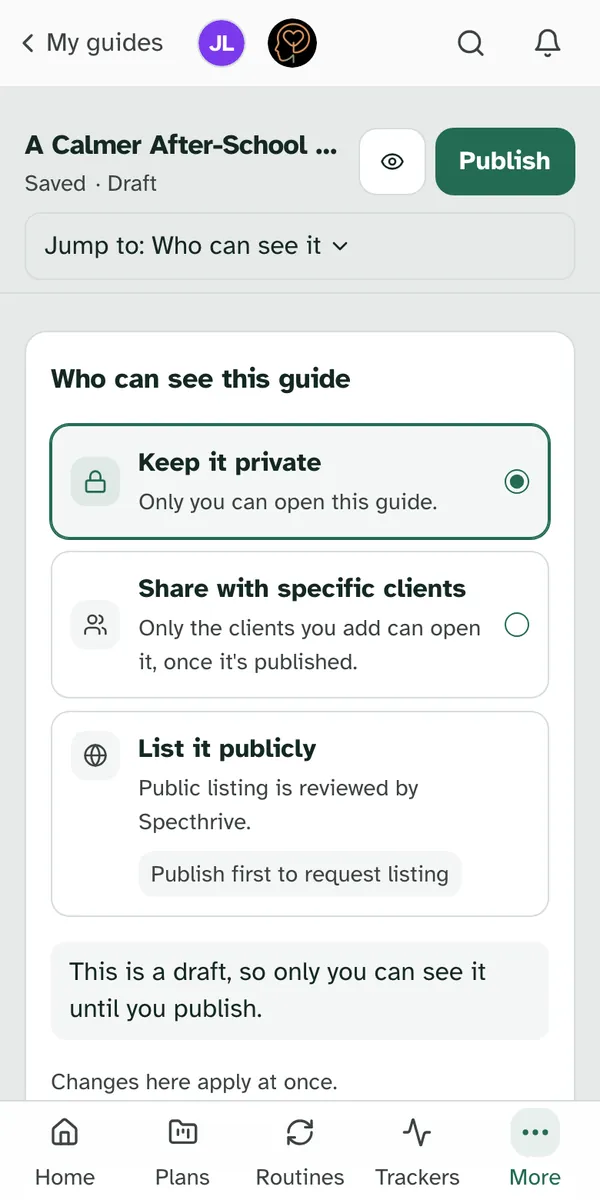
The editor shows the whole guide on one page. On a computer, an outline on the left jumps to Who can see it, Details and each goal. On a phone, Jump to at the top does the same. Along the top are Preview as a client, Save and Publish, with whether your changes are saved and whether the guide is a draft or published.
Details say what the guide is and who it's for. Give it a title, a description, a domain and a journey stage. These are what someone sees before they start it, and the domain and stage are what they filter by on the Guides page.
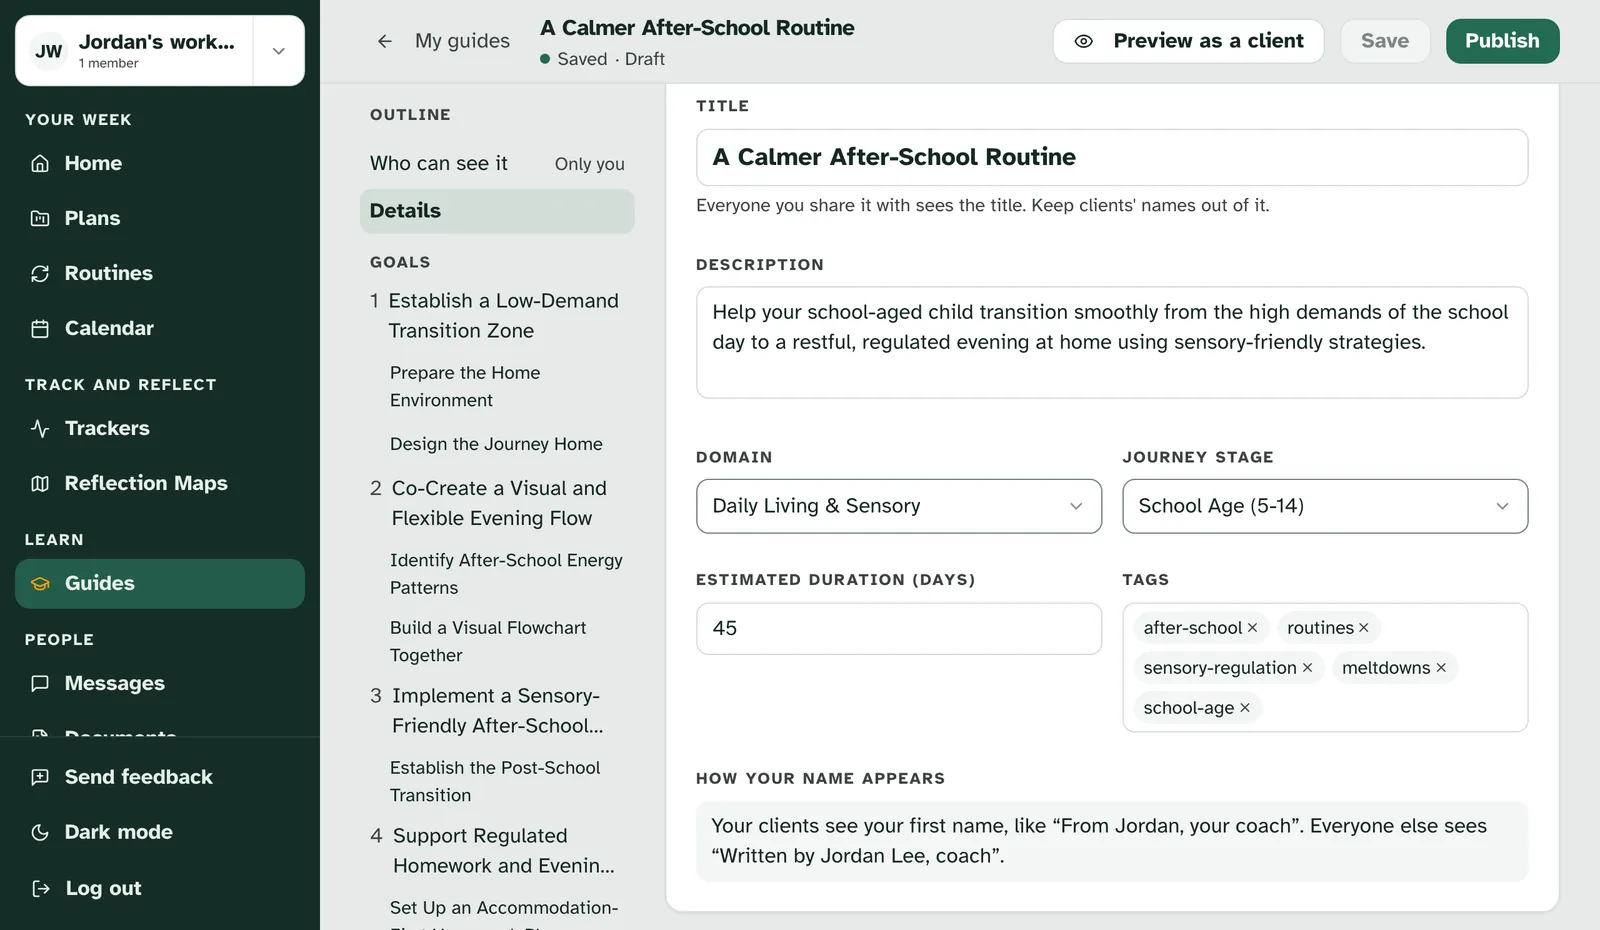
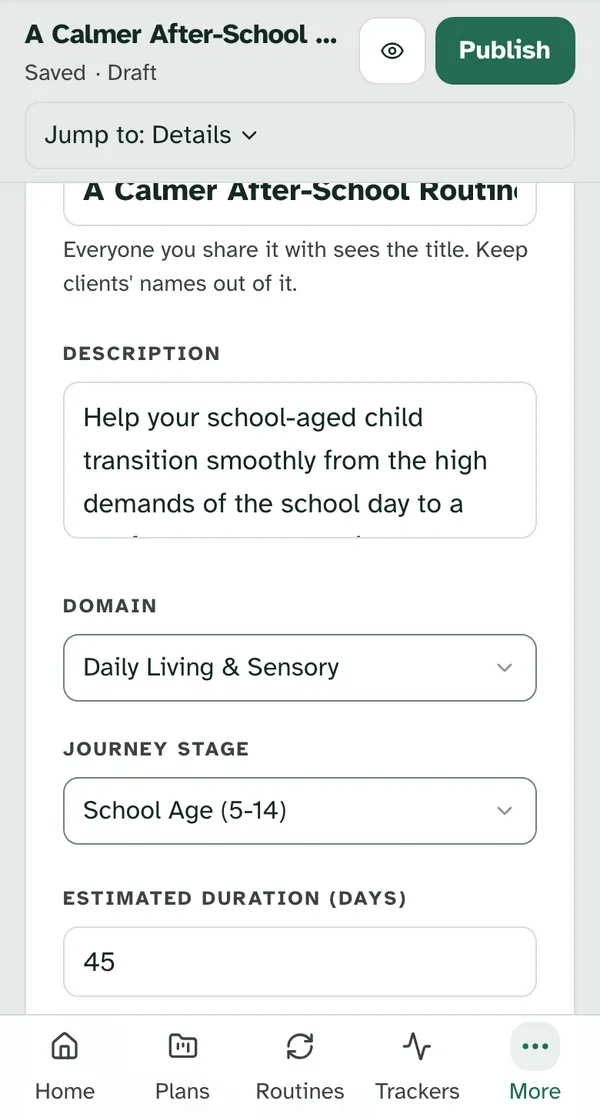
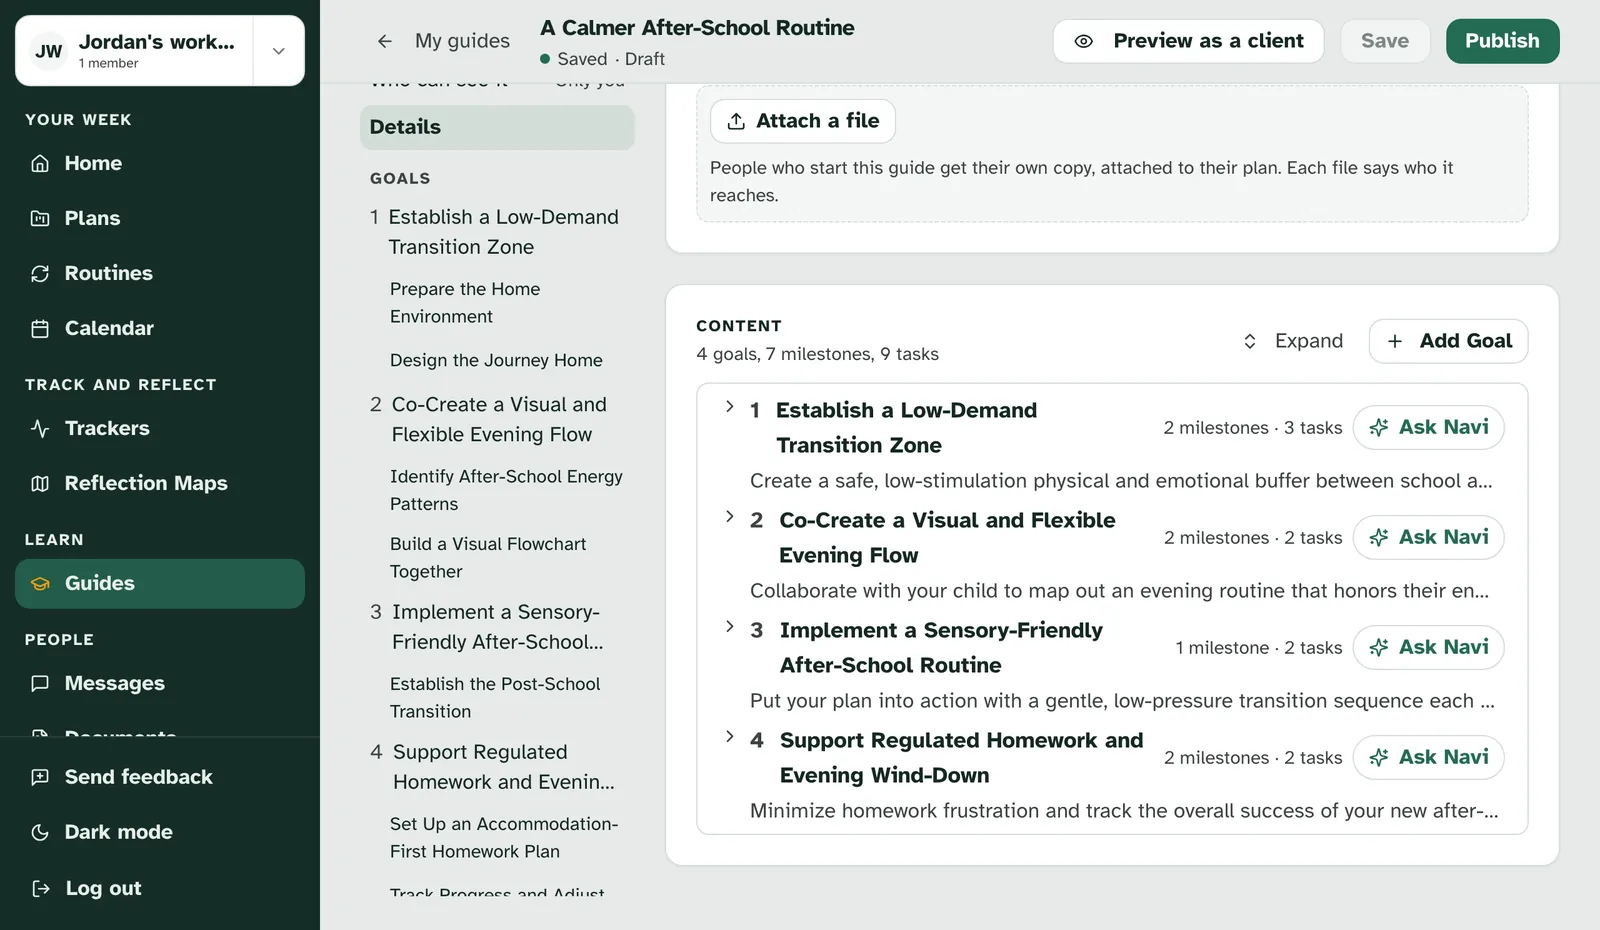
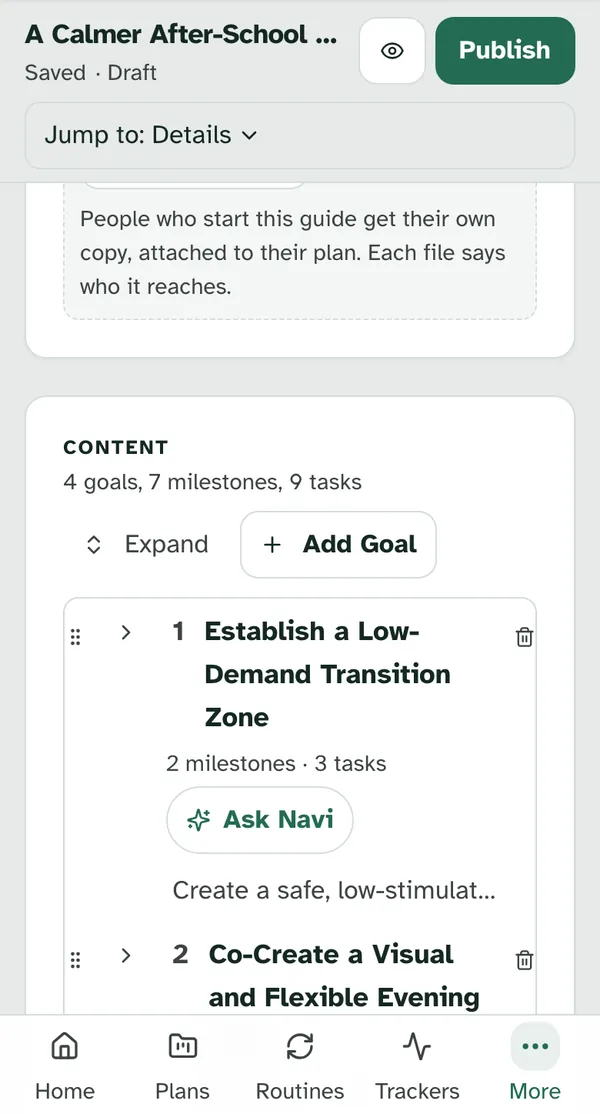
Goals hold the steps. Under Content, choose Add Goal, then add milestones and tasks under it. Drag a goal to change its place.
Files can travel with the guide. Under Files for the whole guide, choose Attach a file: PDF, Word or images, up to 25 MB each. A task can carry files of its own too. People who start the guide get their own copy, attached to their plan, and each file says who it reaches. Before a file is attached, you confirm that nothing in it, its name or its title is about a specific person. Save the guide once before attaching files.
Save often. The editor doesn't save on its own. The top shows "Unsaved changes" until you choose Save.
4. Choose who can see it
Who can see this guide has three choices.
- Keep it private: only you can open it. Every new guide starts here.
- Share with specific clients: only the clients you add can open it, once it's published.
- List it publicly: anyone can find it on the Guides page. Public listing is reviewed by Specthrive, so publish first, then choose Request listing. While Specthrive looks at it, the card says when you asked, with Withdraw if you change your mind.
Choosing a client applies at once. Pick Share with specific clients, then type in Find a client. The list holds your own active clients, the people you work with on Clients. Choose Add next to a name, and they appear as a chip above the search. "Changes here apply at once."
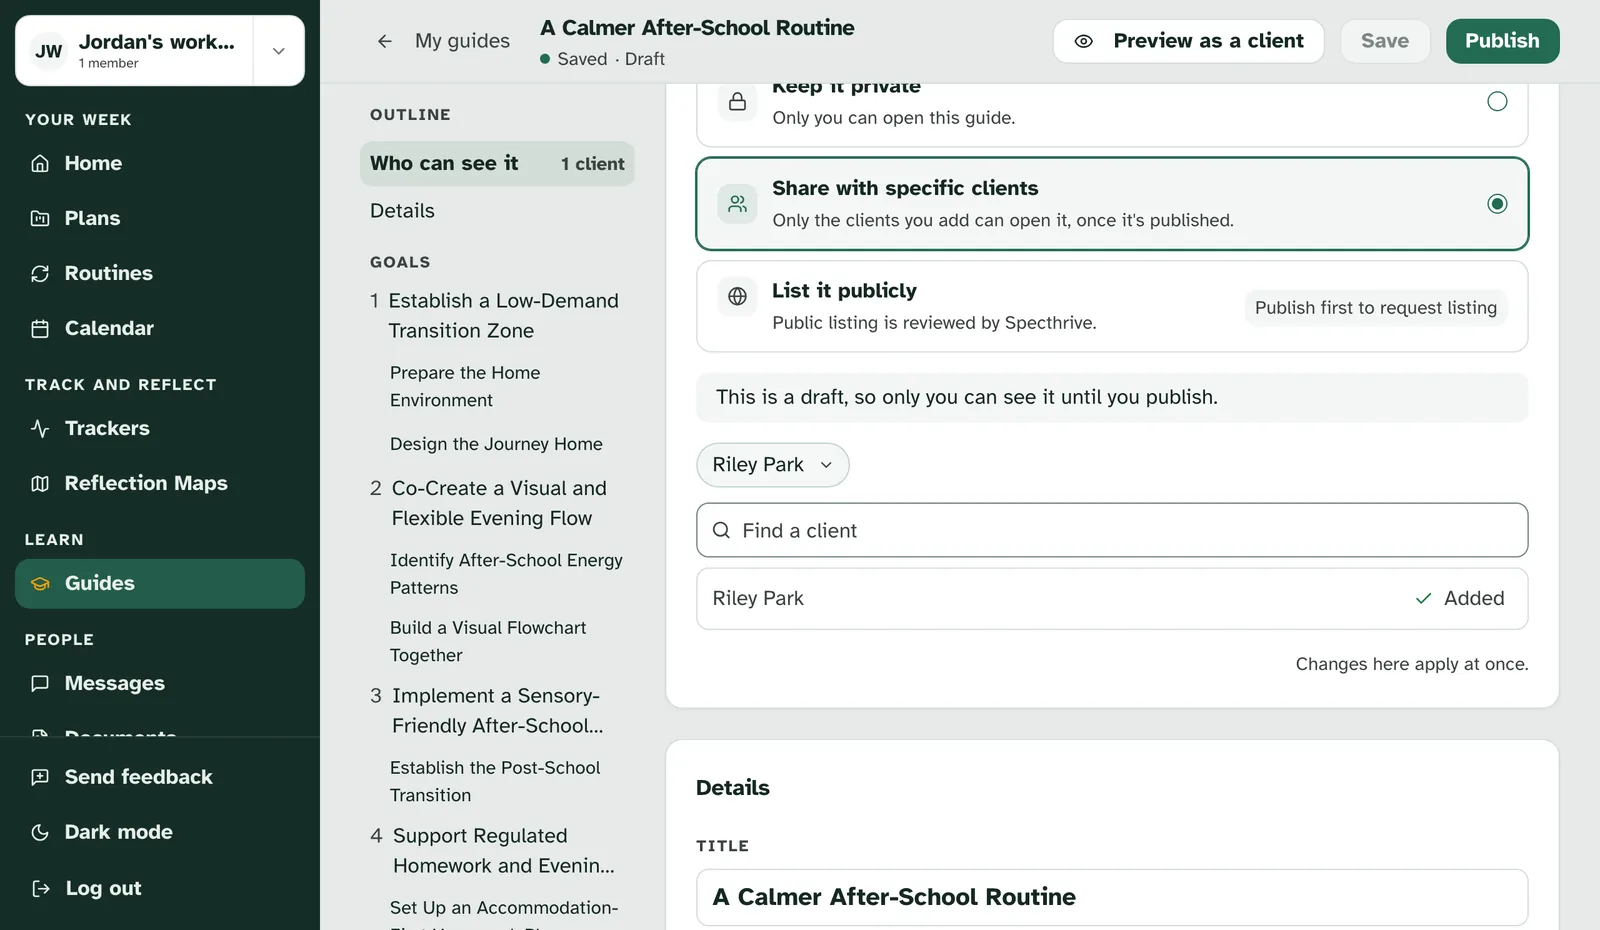
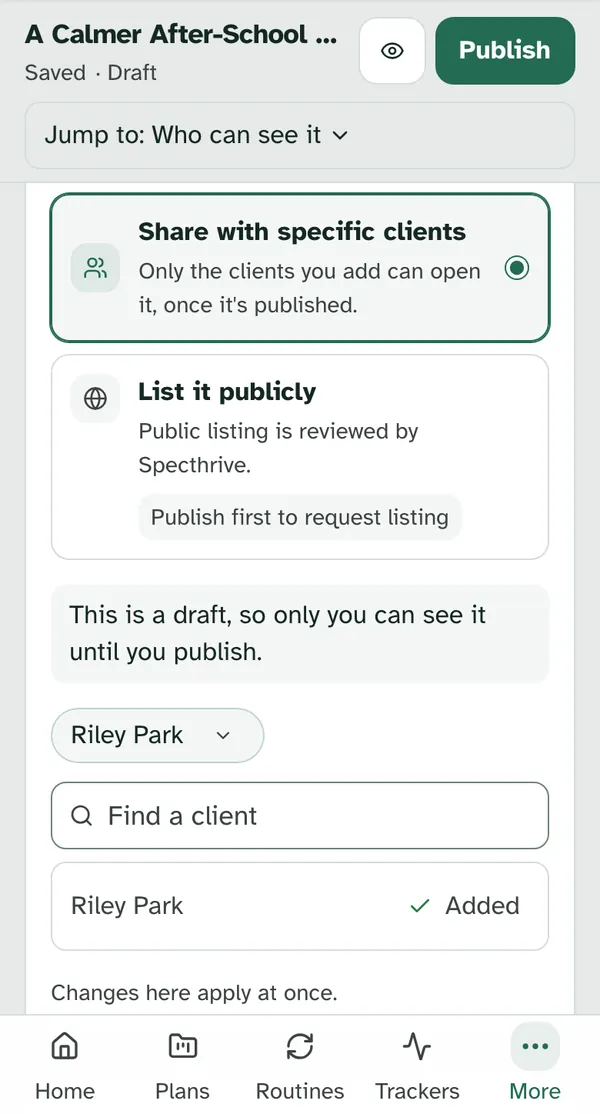
A client's chip has two ways to stop sharing. Stop sharing means they can't start it from now on, and they keep anything they've already started. Take it back removes it from their plans too, with anything they've done in it, and can't be undone, so it asks first.
Your client is told gently, without the guide's name. After Take it back, their timeline shows a note headed "Just so you know": "Jordan removed a guide that was shared with you by mistake.", with your name in place of Jordan's. If they had started it, the note goes on "It's no longer in your plans. Everything else is just as you left it." If not, it says only "Everything else is just as you left it." The note never names the guide, since its title could be about someone else.
5. Check it before you publish
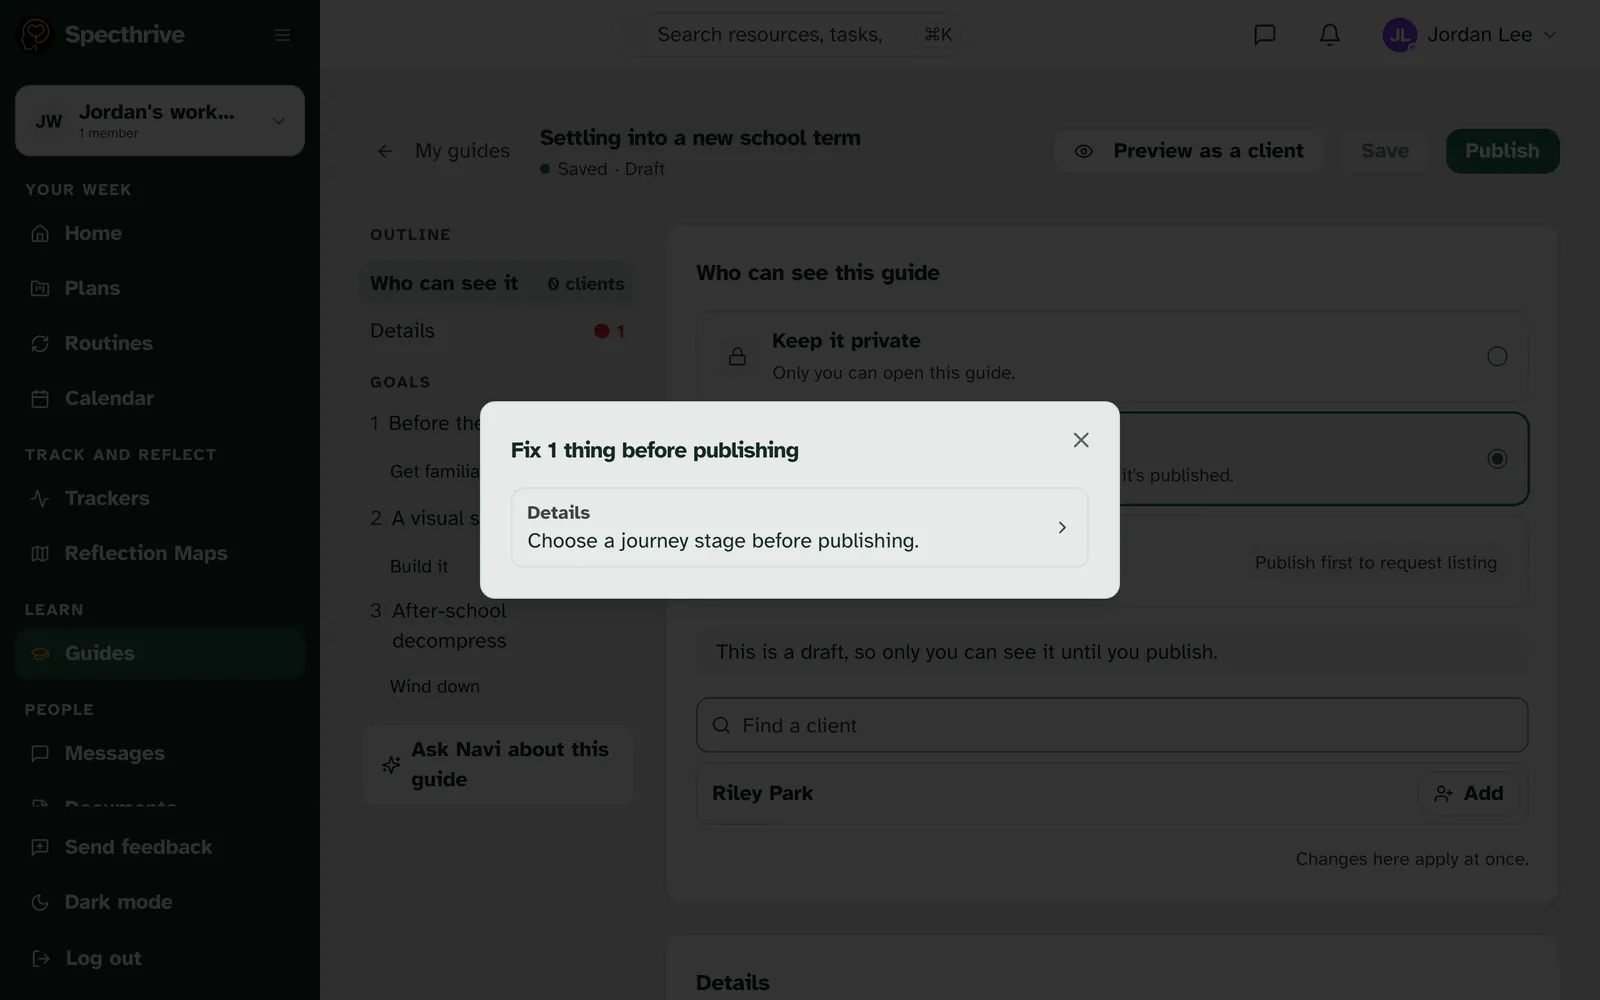
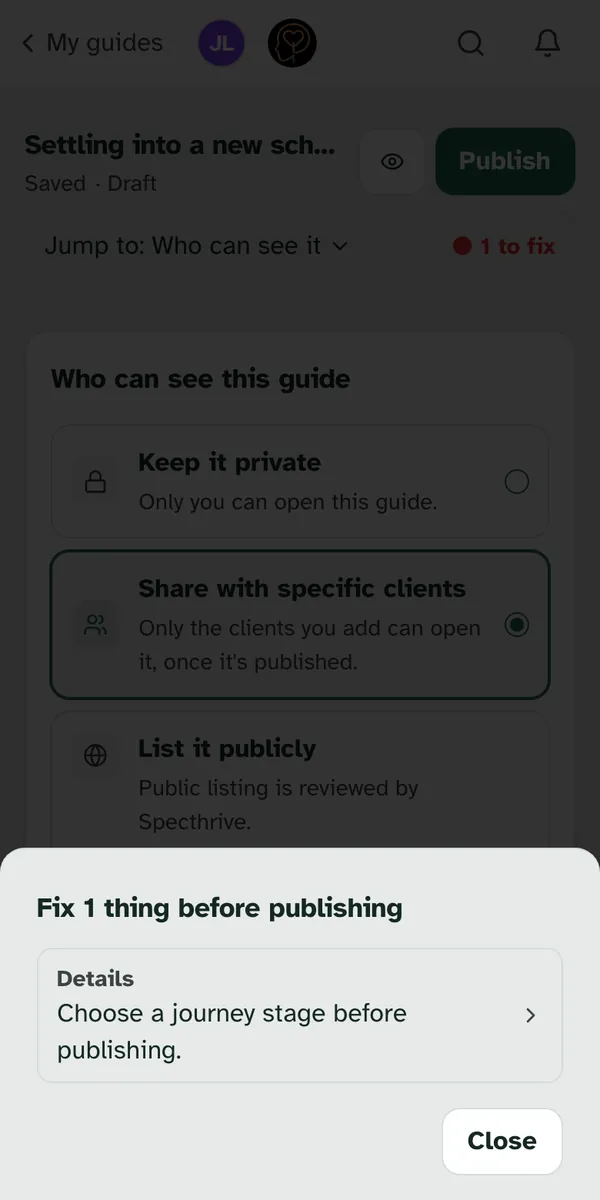
Publish checks the guide first. If something's missing, a short list says what, such as "Choose a journey stage before publishing." or "Add a goal with at least one task before publishing." Each item takes you to the place to fix it. On a phone, the top shows how many things are left to fix.
6. See it as your client will
Preview as a client shows the real guide page. It opens the guide the way it looks to the person starting it. While the guide is a draft, "Preview. Your unpublished changes are included." runs across the top. As your client shows it the way one of your clients sees it, signed with your name, such as "From Jordan, your coach". As someone else shows it the way anyone else who can open it sees it. On a computer, Phone and Desktop switch the size. Add to My Plans is there to see, marked "Preview only".
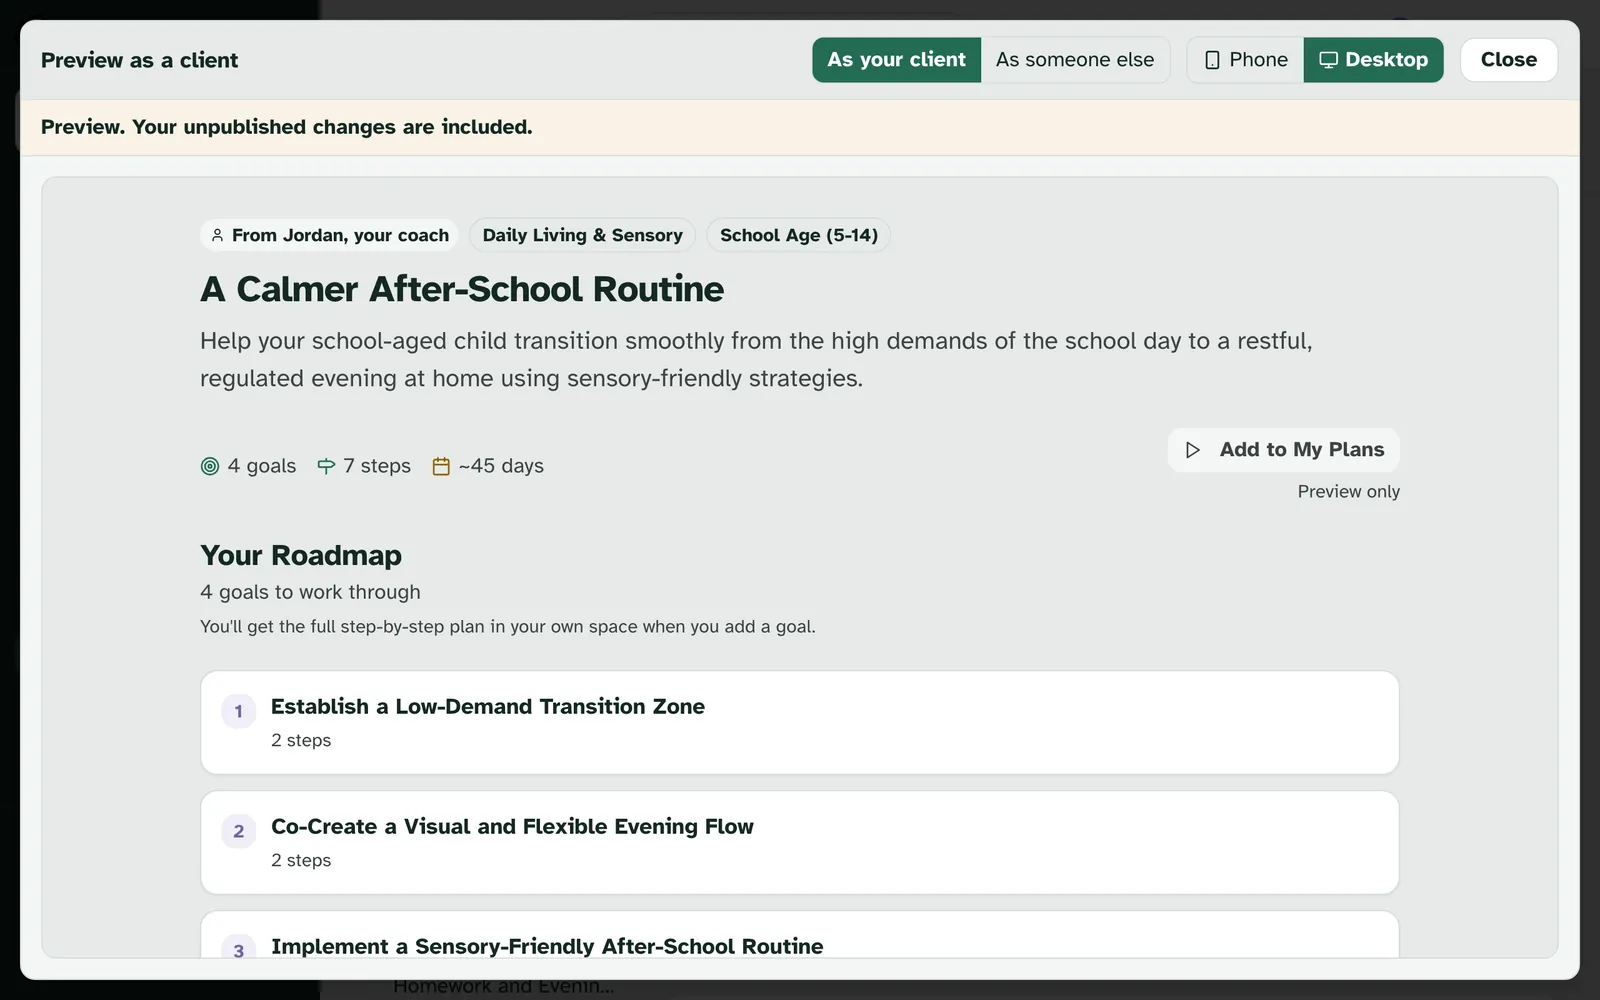
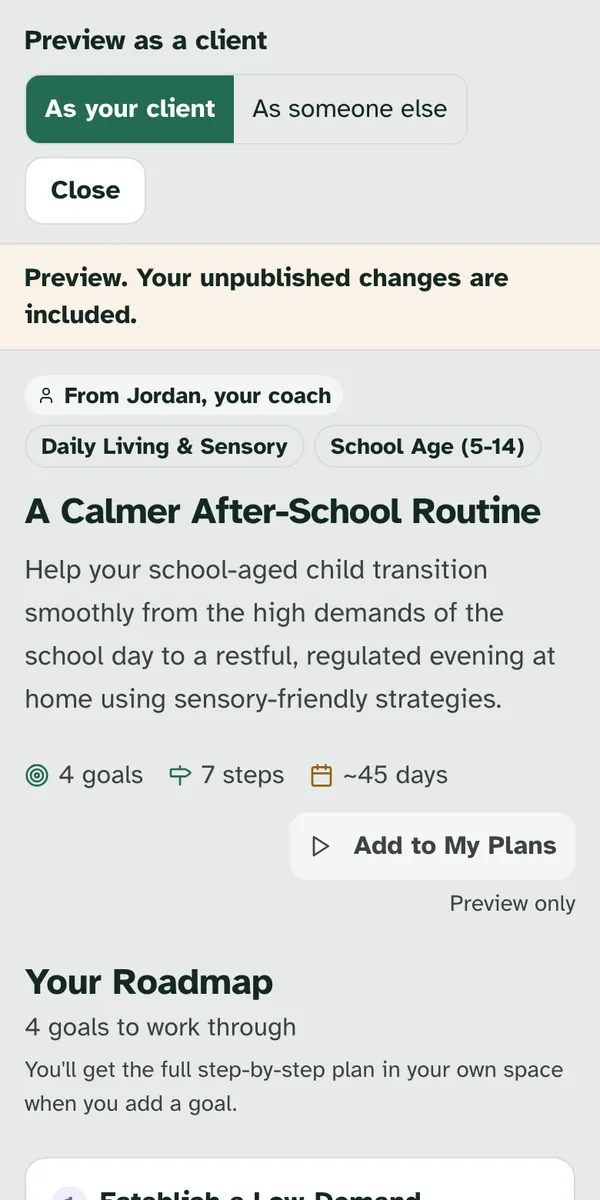
A preview shows what's saved. If you've changed something since your last save, the preview says so and offers Save and refresh.
7. Publish, and change it later
Publishing lets your clients start it. Choose Publish. The window says who can start it, such as "Your 1 client can start it.", and asks you to confirm with Publish, or wait with Not yet. On a phone it opens from the bottom of the screen.
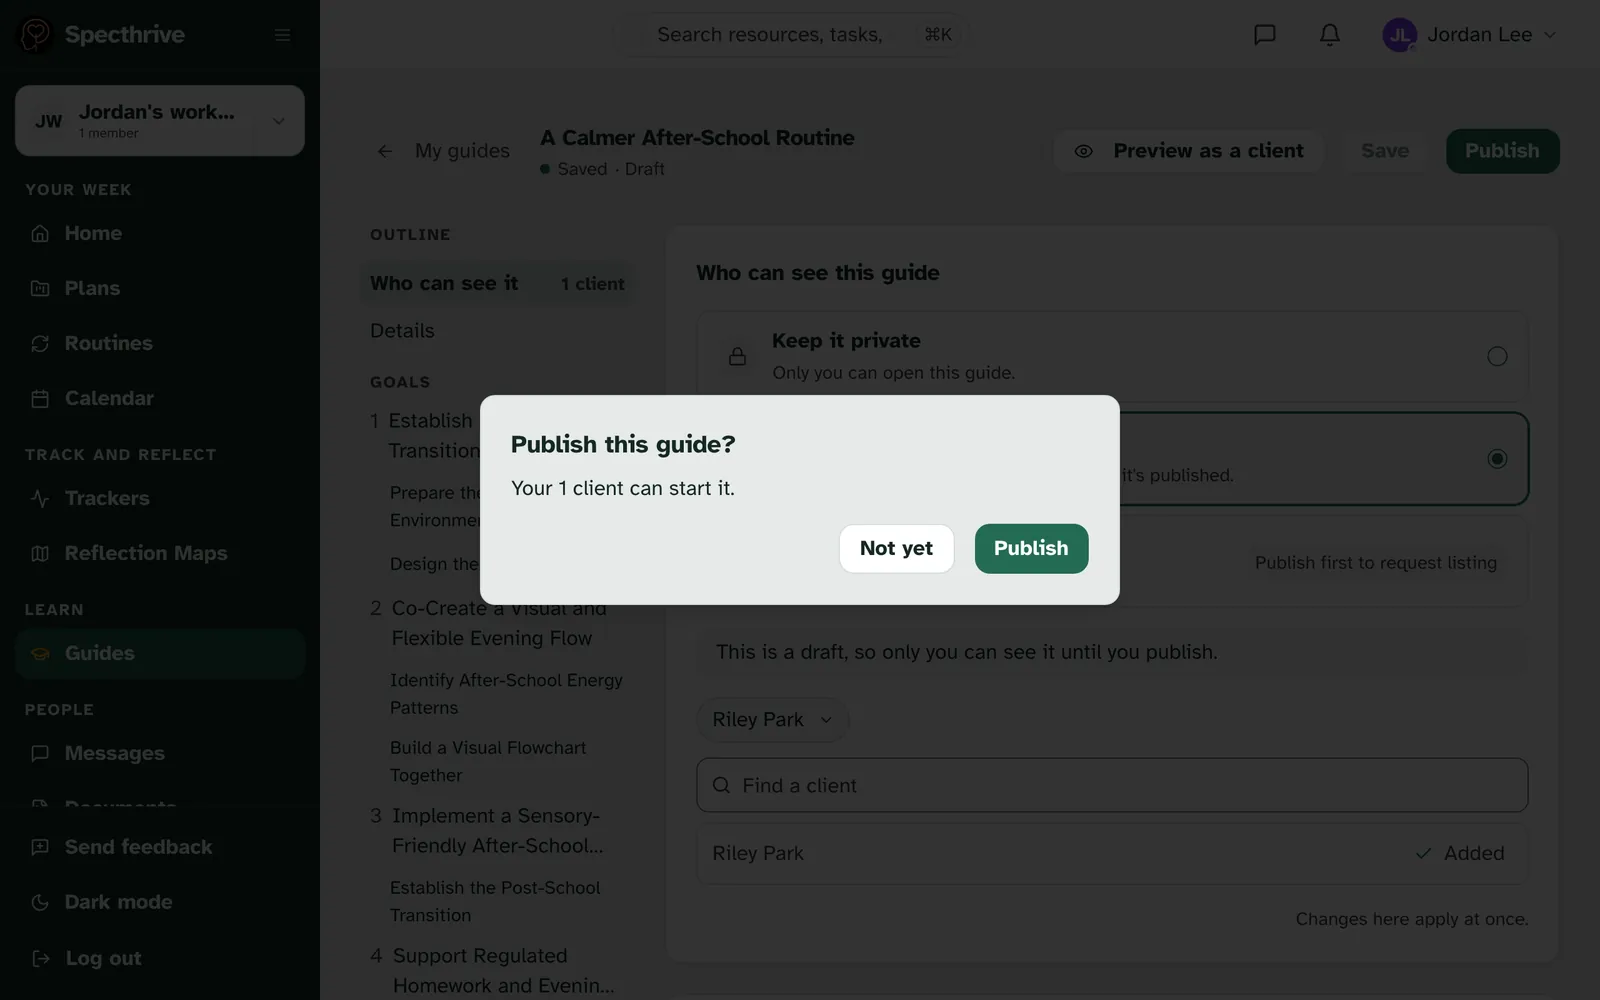
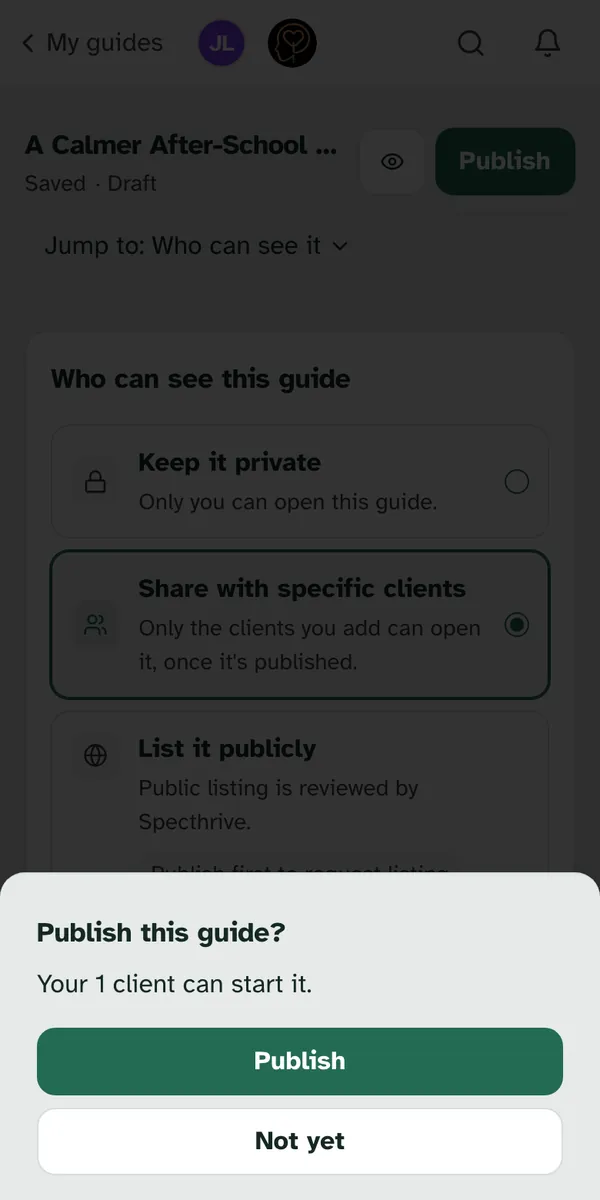
Saving a published guide updates it for its readers. Once a guide is published, the save button says who a save reaches, such as Save and update for 1 client, or Save and update for everyone for a listed guide.
Unpublishing stops new starts. Choose Unpublish from the menu at the top of the editor, or from the guide's ... menu on My guides. People who already added it keep their copy. New people can't start it.
8. Ask Navi for changes
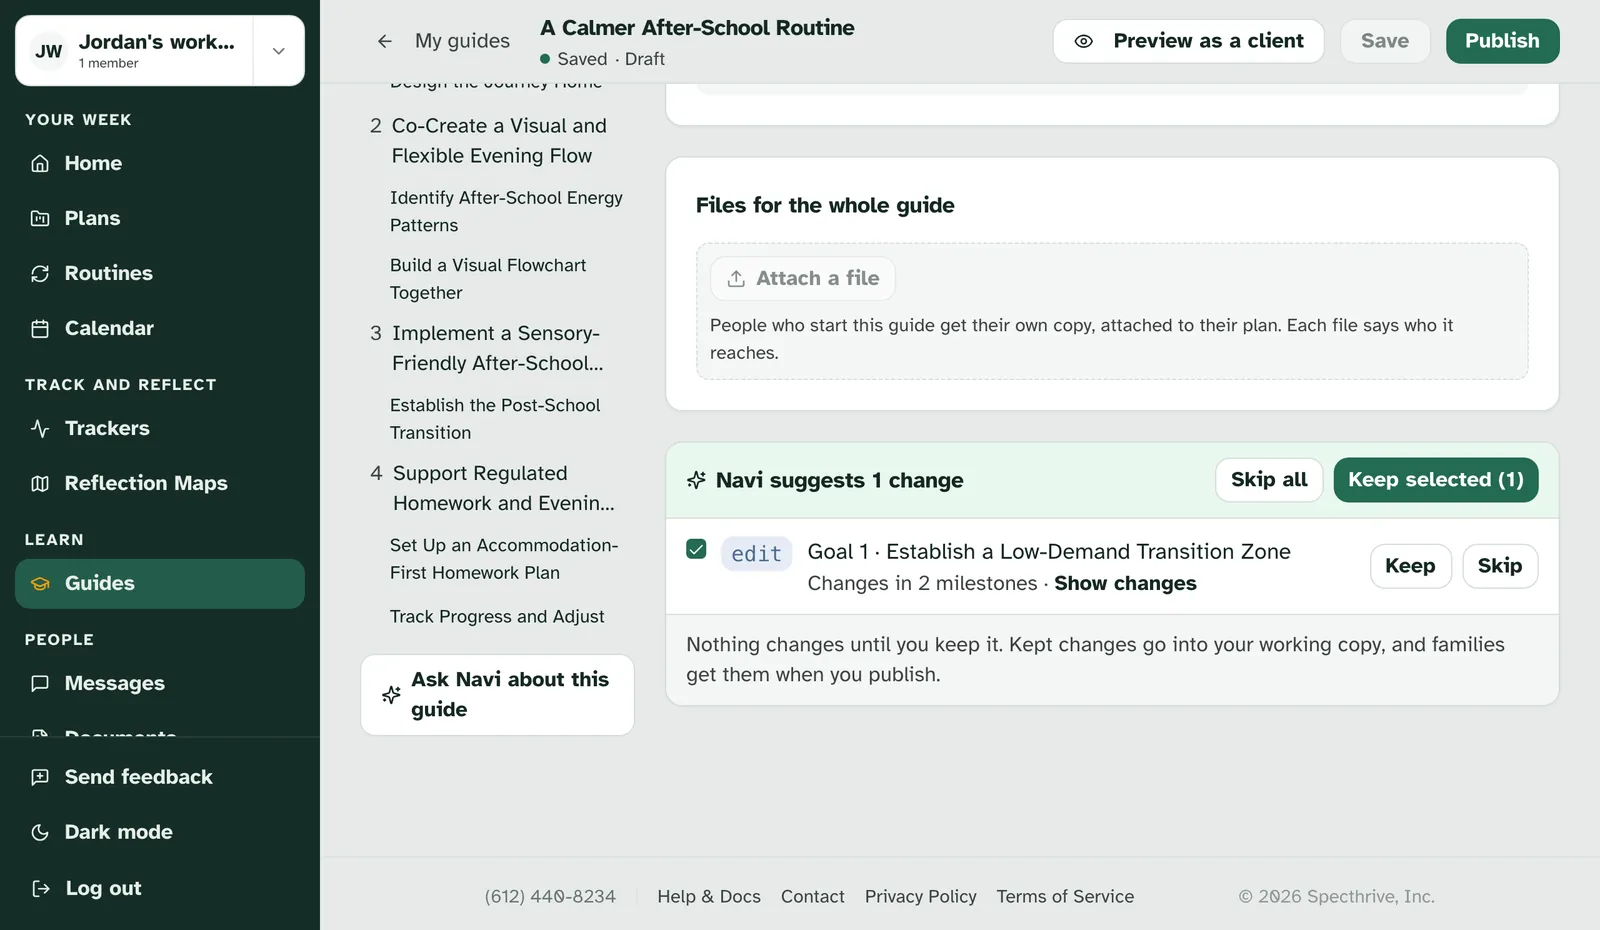
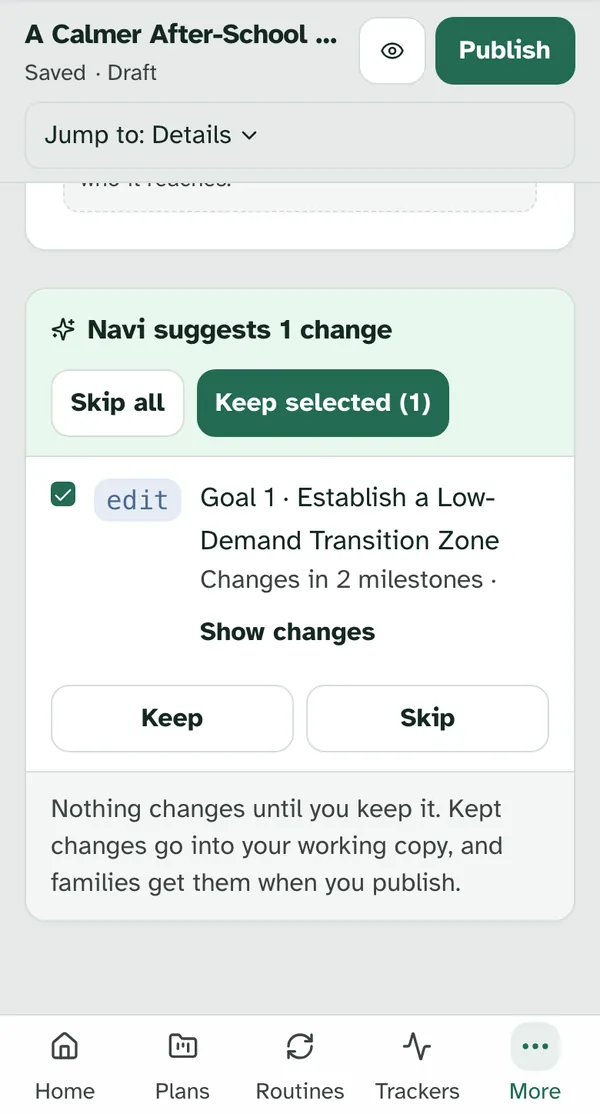
Navi can suggest changes to a guide you're editing. For the whole guide, choose Ask Navi about this guide at the bottom of the outline, which on a phone is in Jump to. For one goal, choose Ask Navi under it, and Navi changes only that goal. Say what you'd like, such as shorter, gentler task titles for a tired parent.
Navi's suggestions wait for you. They appear in the editor under Navi suggests, one row per change. Show changes shows exactly what would change. Keep the ones you want with Keep, or Keep selected, and pass on the rest with Skip or Skip all. "Nothing changes until you keep it." A kept change goes into the editor like your own edits. Saving a draft keeps it, and saving a published guide updates it for the people who can start it, as with any save.
Getting help
If something looks wrong, tell us. If a guide won't publish, a client can't find a guide you've shared, or a file won't attach, get in touch. Tell us which screen you were on, what you chose and roughly when. There's no need to share a client's name or anything about their health.
Still have a question?
If this guide did not cover your situation, reach out. We read every message.